Move-Out Cleaning: 15 Things Landlords Actually Check Before You Hand Over the Keys
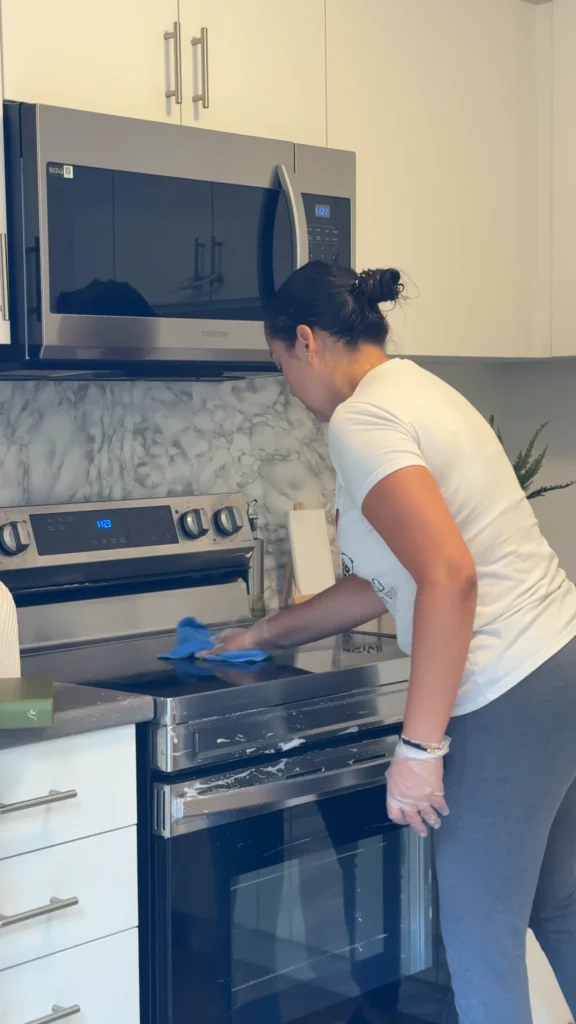
Moving day is chaotic enough without wondering if you’re going to lose part of your last month’s rent over a dirty oven. If you’ve ever stood in an empty apartment at 11 p.m., exhausted, staring at a stovetop you swear you cleaned, you already know the stress that move-out cleaning creates. This guide breaks down exactly what landlords and property managers look for during a final inspection, the mistakes that cost tenants the most, and how a proper move-out cleaning checklist protects everyone involved – tenant, landlord, and the next person walking through the door. Move-out cleaning isn’t just about vacuuming the floors and wiping the counters. It’s a detailed, room-by-room process that determines how quickly a property gets re-rented, how a landlord views the outgoing tenant, and whether a final inspection goes smoothly or turns into a dispute. A rushed, surface-level clean almost always misses the exact spots landlords check first: inside appliances, baseboards, window tracks, and grout lines. Professional move-out cleaning saves time, reduces the back-and-forth of disputed deductions, and gives homeowners, renters, and property managers across the Niagara Region peace of mind that the property is truly ready for its next chapter. In this guide, you’ll learn what inspectors actually look for, the most common mistakes tenants make, a full room-by-room checklist, and how to decide between doing it yourself or calling in professional move-out cleaners like NLLC. Think about the last time you toured a rental listing online. Chances are, the photos that made you stop scrolling were the ones with bright, spotless kitchens and gleaming bathroom tile. Landlords know this too. A property that looks tired or dirty in listing photos sits on the market longer, and a property that smells clean and looks cared for during an in-person showing rents faster. Move-out cleaning is the bridge between one tenancy ending and the next one beginning smoothly – and getting it right benefits everyone at the table, not just the person collecting the keys back. Why Move-Out Cleaning Matters More Than Most People Think A lot of tenants assume that “clean enough” is good enough. In reality, move-out cleaning carries more weight than almost any other part of the moving process, for a few practical reasons. First impressions during final inspection. A landlord or property manager typically walks through a unit with a checklist and a flashlight, checking corners, cabinet interiors, and appliance seals that tenants rarely think about day to day. A property that looks and smells clean the moment the door opens sets a positive tone for the entire walkthrough. Faster preparation for new occupants. In the Niagara Region, rental demand has stayed tight, with regional vacancy rates sitting well below the national average through the past year. That means landlords want units turned around quickly – a spotless unit can be photographed, listed, and shown almost immediately, while a dirty one needs an extra cleaning day (or more) before it’s presentable. Helps reduce complaints and delays. Disputes over cleanliness are one of the more common friction points between landlords and tenants at the end of a lease. A thorough clean, backed by photos, drastically reduces the odds of a disagreement dragging out. Benefits for landlords, tenants, homeowners, and property managers. It isn’t just tenants who benefit. Landlords save money by not having to hire emergency cleaning crews between tenants. Homeowners preparing a property for sale benefit from the same deep-clean standard. Property managers overseeing multiple units benefit from consistency, since every unit is handed back in a similar, predictable condition. There’s also a financial angle that’s easy to underestimate. Niagara Falls has seen a genuine surge in rental demand over the past year, with two-bedroom units in some neighbourhoods averaging well above two thousand dollars a month and vacancy rates sitting under one percent in parts of the city. When a landlord can turn a unit around in days instead of weeks, that directly protects their income. A tenant who leaves a property genuinely move-in ready is doing the landlord a real favour – and that goodwill often translates into a smoother reference for the next rental application, or a landlord who’s more flexible about timelines and minor issues during the walkthrough. The reverse is also true. A property that needs an extra day or two of cleaning before it can be shown costs a landlord real money in lost rent, and it’s one of the fastest ways to sour an otherwise uneventful move-out. This is exactly why move-out cleaning deserves more attention than most tenants give it. What Landlords Actually Look For During a Move-Out Inspection This is the heart of any move-out cleaning checklist: knowing exactly what an inspector’s eyes go to first. Below are the areas that come up again and again during final walkthroughs. Kitchen Appliances The kitchen is usually where inspections succeed or fail. It’s also the room that takes the most time to clean properly, because appliances trap grease and food residue in places that don’t get touched during a normal week of cooking. Landlords check: A good rule of thumb: if an appliance has a door, a landlord is going to open it. Fridges and ovens left with visible grime are one of the fastest ways to leave a negative impression in the first sixty seconds of an inspection – and one of the slowest parts of the unit to clean properly if it’s left until the last minute. Cabinets and Drawers Cabinets look fine from a distance, but landlords open every one. They’re checking for: Bathroom Cleanliness Bathrooms are the second-most scrutinized space after the kitchen, largely because moisture makes dirt and buildup so visible. Inspectors look at: Hard water buildup is especially common across the Niagara Region, where mineral-rich water can leave visible spotting on fixtures within just a few weeks if they aren’t wiped down regularly. A descaling solution or a simple vinegar soak on showerheads and faucets makes a noticeable difference here. Floors and Baseboards Floors get an obvious pass,
The Complete Move-In Cleaning Checklist Every Homeowner Should Follow Before Unpacking
Moving into a new home in Niagara Falls, St. Catharines, Welland, or anywhere else in the Niagara Region is exciting, but there’s one step homeowners often skip: cleaning the house before the boxes go in. Even a home that looks spotless during a showing can be hiding dust, bacteria, allergens, grease, and leftover debris from the previous owners, contractors, or vacant months on the market. That’s where a proper move-in cleaning checklist comes in. Cleaning an empty house is far easier than cleaning around furniture, and doing it before you unpack means every surface, cabinet, and appliance gets attention you simply won’t have time for once life gets busy again. In this guide, we’ll walk you through exactly what to clean, in what order, and why it matters, so you can start life in your new home on a genuinely fresh note. Whether you’re a first-time buyer settling into St. Catharines or a growing family moving into a larger property in Niagara Falls, this move-in cleaning checklist will help you cover every room, avoid the most commonly missed spots, and decide whether DIY or a professional move-in cleaning service is the smarter choice for your situation. This guide is built around what actually happens during a real move: closings that get pushed back, homes that sit vacant for weeks before you take possession, and moving trucks that show up on a schedule you don’t fully control. With that in mind, we’ve organized this move-in cleaning checklist so you can adapt it whether you have a full weekend to prepare or just a few hours before the truck arrives. Why Move-In Cleaning Should Be Your First Priority It’s tempting to start unpacking the moment the keys are in your hand. But cleaning first, before furniture and boxes fill every room, sets the tone for how healthy and comfortable your home will feel for years to come. Health and Hygiene Benefits You don’t know how the previous occupants lived, whether they had pets, smoked indoors, or kept up with regular cleaning. Countertops, cabinet interiors, and bathroom fixtures can carry bacteria and residue long after a home looks “move-in ready” on paper. A full move-in cleaning checklist removes that uncertainty before your family settles in. Better Indoor Air Quality Indoor air is often more polluted than outdoor air, largely due to dust, pet dander, mold spores, and chemical residue that build up over time indoors. In an empty home, that dust has nowhere to hide, it settles into vents, baseboards, window tracks, and closets. Vacuuming, wiping down surfaces, and clearing vents before you move your belongings in helps reduce what your family breathes in every day. It’s Easier to Clean an Empty House Cleaning around a couch, a bed frame, or stacked moving boxes is slow and frustrating. An empty room lets you reach every corner, wipe every baseboard, and mop every inch of flooring without having to work around furniture. It’s simply the fastest and most thorough way to clean a home. Prevents Odors and Hidden Dirt Old carpets, closets, and cabinets can hold onto smells from cooking, pets, cleaning products, or even cigarette smoke. Addressing these before you unpack prevents those odors from transferring onto your furniture, clothing, and belongings. Gives Your Family a Truly Fresh Start There’s something genuinely satisfying about walking into a home that smells clean, looks bright, and feels like it’s truly yours, not a space someone else recently lived in. A move-in cleaning checklist is what makes that fresh-start feeling possible. Cleaning Supplies You’ll Need Before You Begin Before you dive into your move-in cleaning checklist, gather these essentials so you’re not making repeated trips to the store: Having these on hand from the start keeps your cleaning day efficient and prevents unnecessary interruptions once you’re in the flow. Prepare Before You Start Cleaning A little preparation goes a long way toward making your move-in cleaning day smooth and stress-free. Follow the Right Cleaning Order Professional cleaners follow a specific sequence for a reason: it prevents you from re-cleaning the same spot twice. The logic is simple: cleaning from top to bottom means dust and debris that falls during the process lands on surfaces you haven’t cleaned yet, not ones you’ve already finished. Floors are always left until the very end, since they collect whatever settles from cleaning everything above them. If you mop first and then dust the ceiling fan, you’ll just be mopping again. Room-by-Room Move-In Cleaning Checklist Kitchen Cleaning Checklist The kitchen usually needs the most attention on any move-in cleaning checklist, since grease, food residue, and crumbs tend to hide in places that are easy to overlook. Even a kitchen that was staged beautifully for showings can have sticky cabinet corners, grease film on the range hood, or crumbs wedged into drawer tracks that a quick pre-sale tidy-up never touched. Bathroom Cleaning Checklist Bathrooms hold more bacteria than almost any other room, which makes them essential on your move-in cleaning checklist. Moisture, soap residue, and limited ventilation make bathrooms one of the few rooms where mold and mildew can develop even in a home that otherwise looks well kept. Bedroom Cleaning Checklist Bedrooms are where you’ll spend the most unconscious hours in your new home, so don’t skip these details, especially since dust and allergens that settle in bedding and carpet fibers directly affect sleep quality. Living Room Cleaning Checklist As the room where your family will spend the most time together, the living room deserves the same top-to-bottom approach as the rest of the house. Laundry Room Checklist Laundry rooms are easy to overlook since they’re utilitarian spaces, but they need attention too, particularly around moisture-prone appliances. Don’t Forget These Often-Missed Areas Even a thorough move-in cleaning checklist can miss these spots, and they’re the ones professional cleaners specifically look for: These areas collect dust and grime for months or years without anyone noticing, until someone finally looks closely. Covering them now means you won’t be surprised by a layer